How to Add a Widget to your Wordpress Blog
My awesome wife asked me to do her a favor, “Can you write a tutorial on how to add an HTML widget to a Wordpress blog?”
While I’m sure that there is already probably fifty explanations on how to do it, but well, I’ll write it anyway:
Step One: Smile. Think to yourself, “This is easy. I can do this.”
Step Two: Open your Wordpress Admin page.
Step Three: Navigate to Appearance > Widgets
Step D: Select the widget type you want. If you’re doing an HTML widget, select “Text: Arbitrary text or HTML”
Step E: Drag the button to the sidebar (you may have more than one) that you want to have the widget on.
Step F: Stop worrying about the fact that I changed my enumeration system half way through.
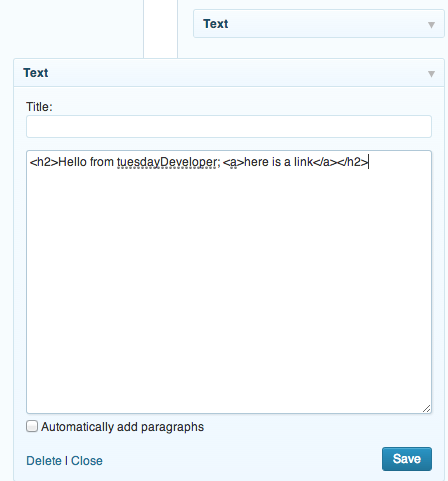 Step G: Expand the widget editor by clicking on it and editing the title (optional) and the body of your widget (see image).
Step H: Click Save.
Step I: Check your changes by navigating to your blog.
Step J: If there are changes you want to make, go back to Step One, skip Step D, and continue until you have the widget in the way you want it.
Step K: That is it.